


Taming the Managed Solution Beast - How to Update Environment Variables
May 10, 2024
1 min
Let create first a SharePoint List as our source of choices in our dropdown.
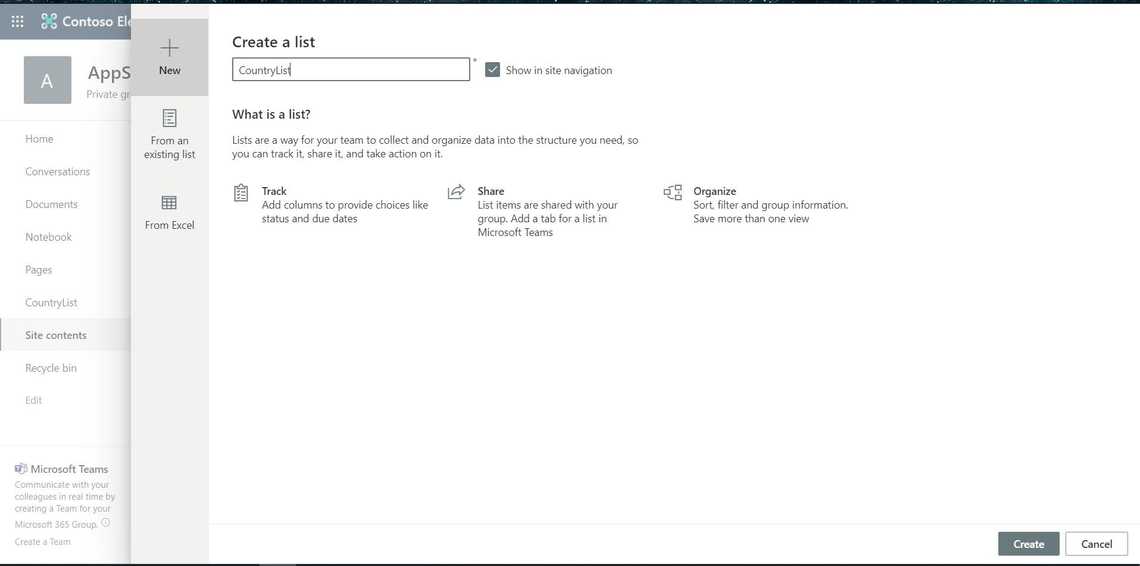
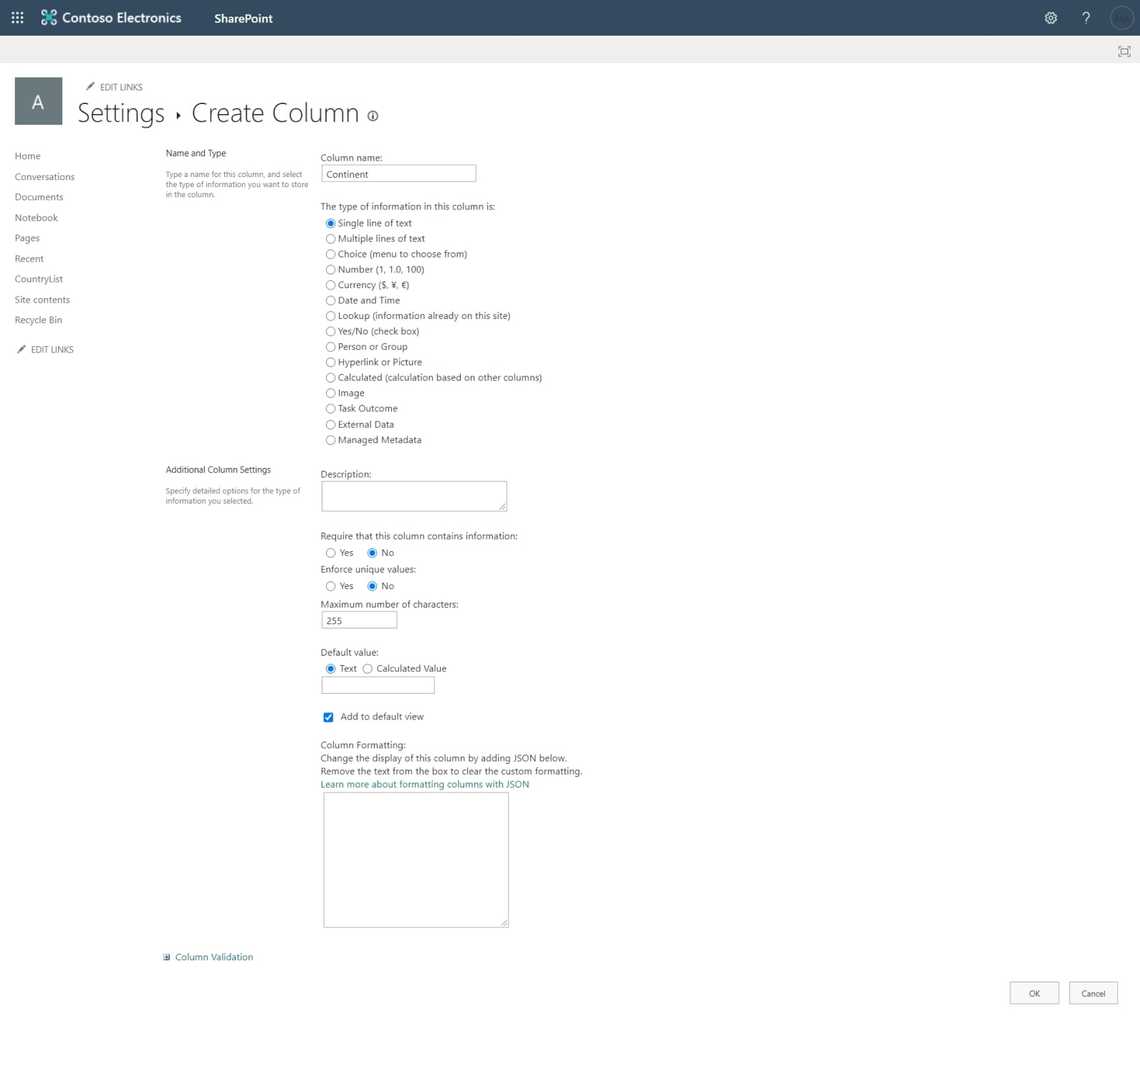
On the list(CountryList) that we created, let’s add a column and lets named it Continent(Single line of text)
Let’s try to populate it with different sets of data.

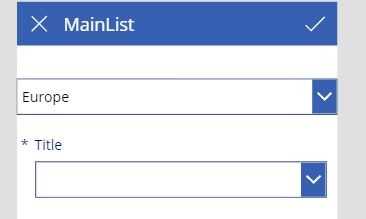
Now we will create a new list, and let’s call it our MainList
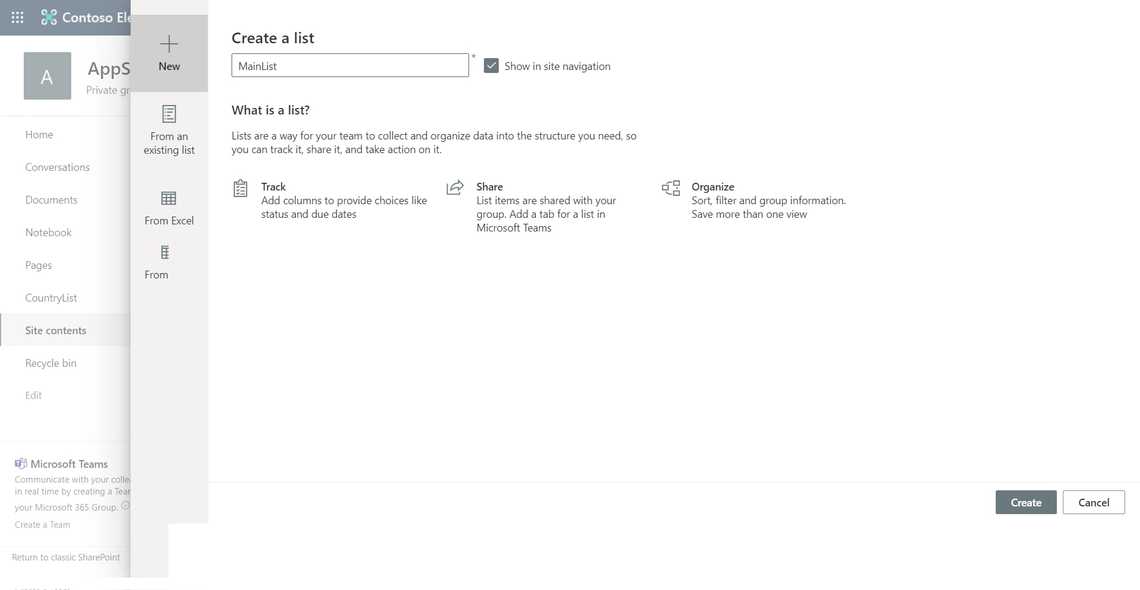
The new list we created would be our list where we are going to store our user input. Now we will try to customize its form using PowerApps.
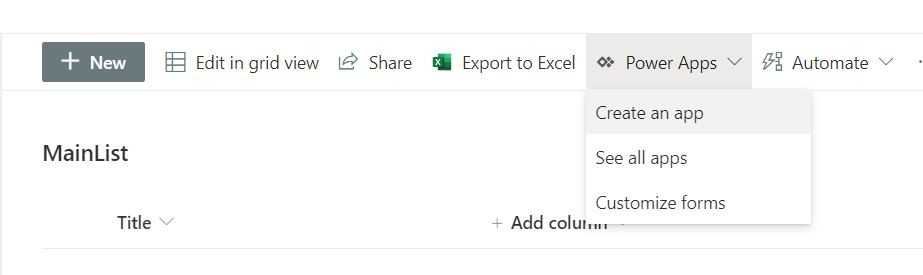
Let’s call our form “CascadingDropdownForm,” then press Create
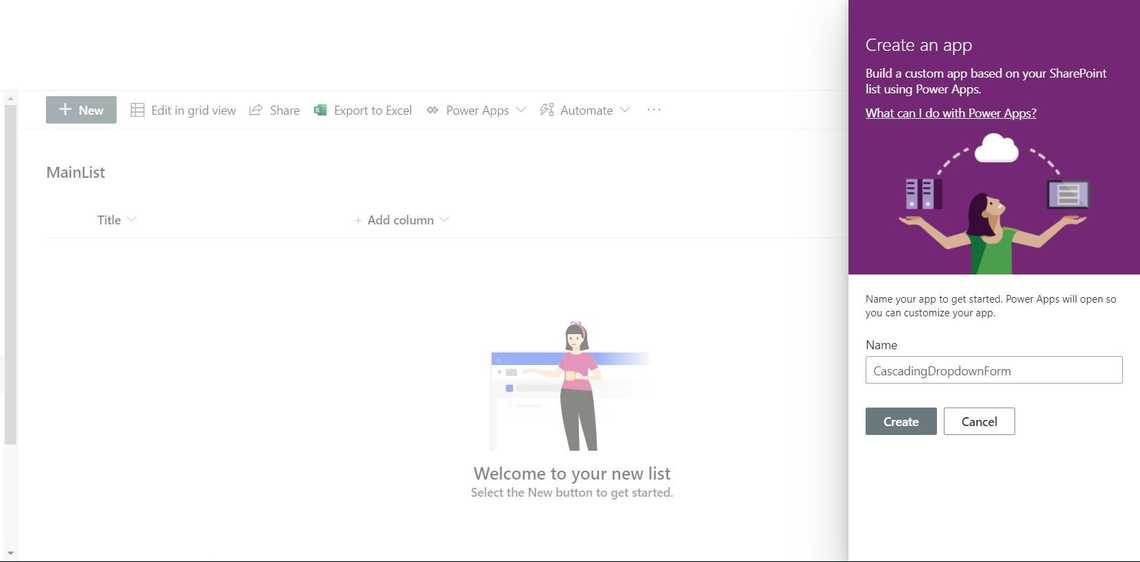
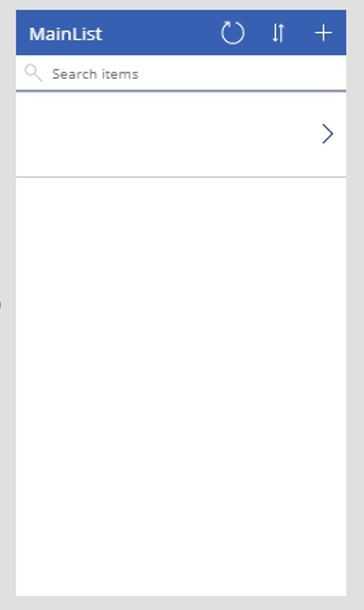
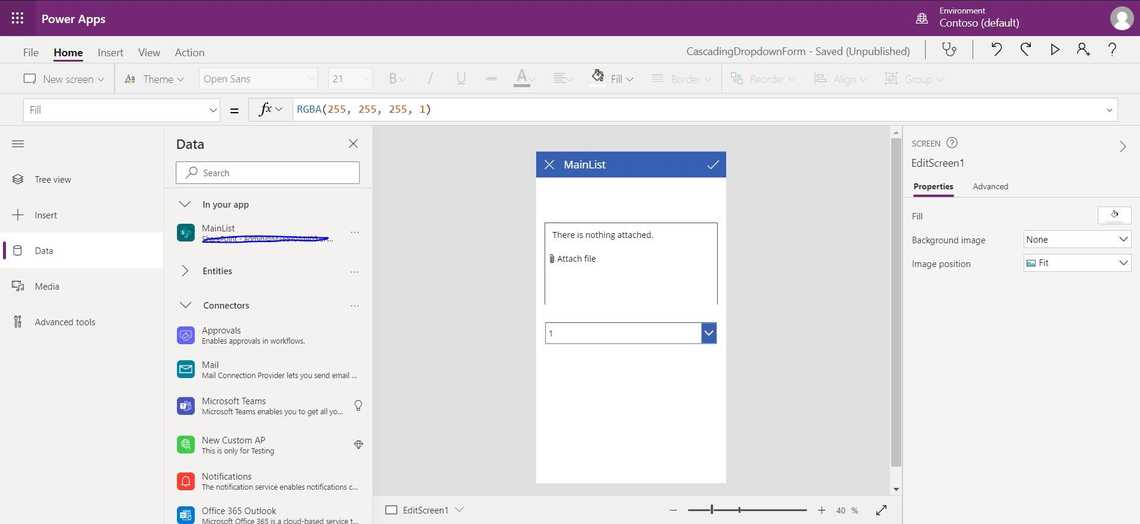
Typically, the apps don’t show any data because no item has been added yet.
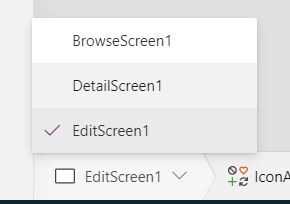
Let go to EditScreen1.
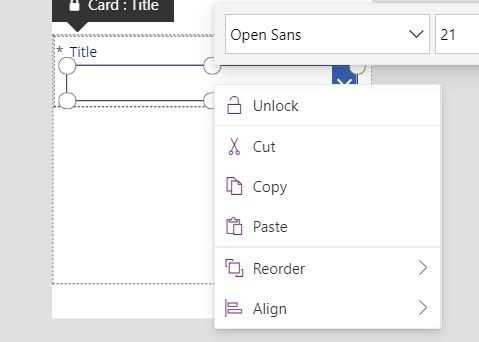
Now we will change the “Title” field from a single line of text to “Allowed Values” by clicking on the
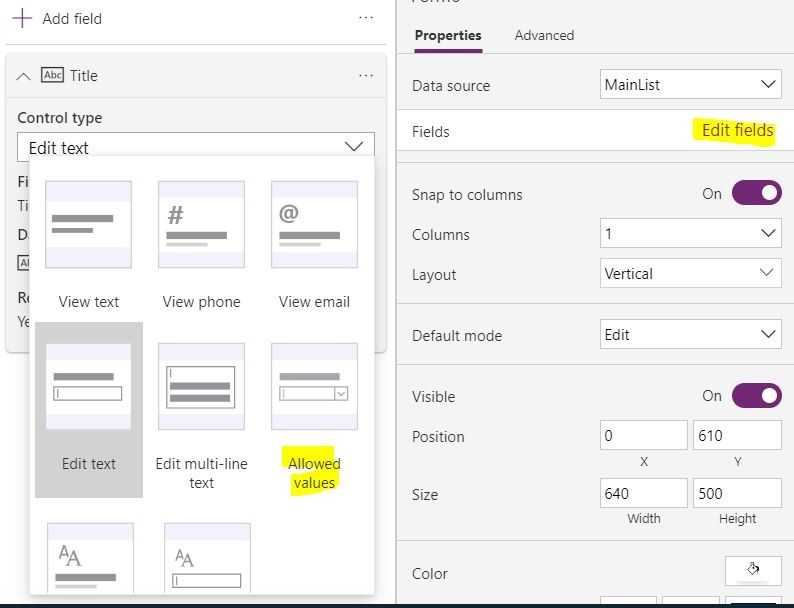
Now we need to unlock it by clicking on the “Title” dropdown and right-click on, and clicking on “unlock.”
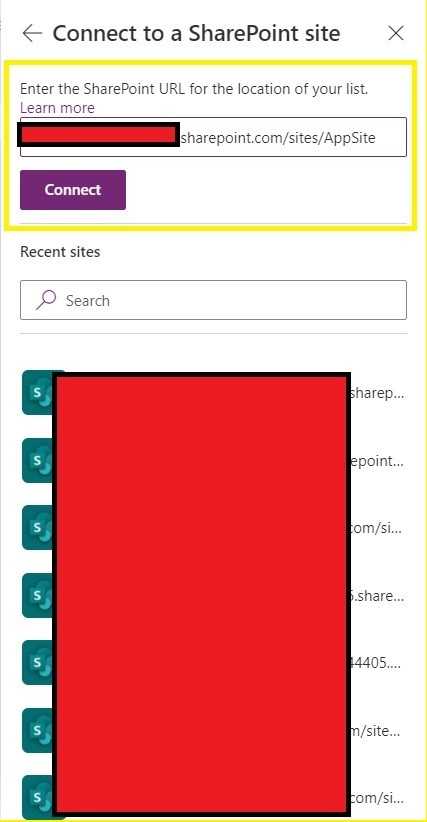
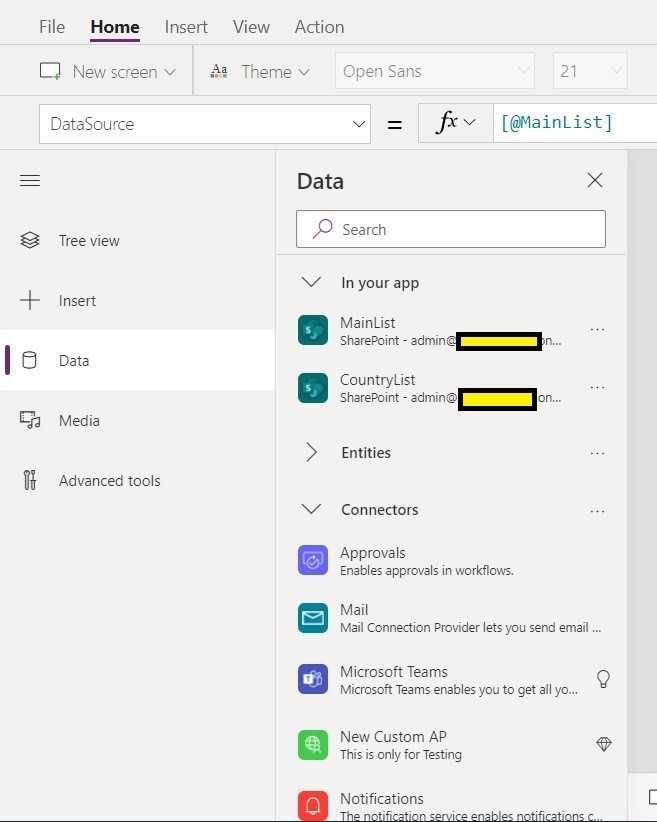
After that, we will add a connector to our App. This connector will point to our CountryList. To do that, lets click on the “Data”> Connectors > SharePoint
Enter the site URL of your site and hit connect
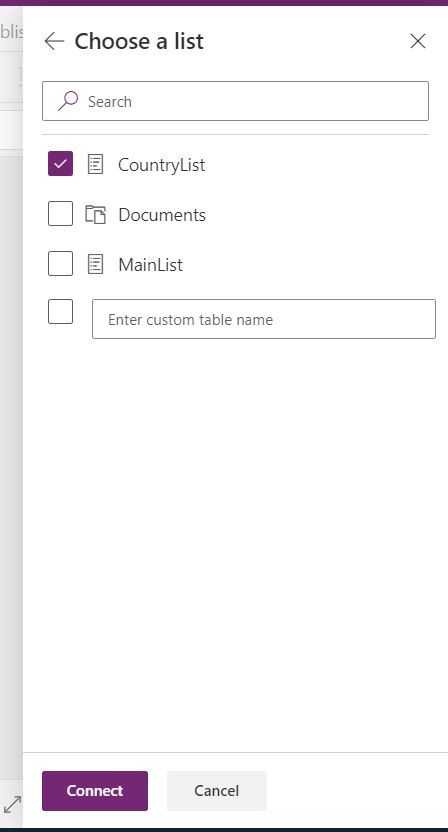
Kindly select our “CountryList” and then press Connect.
This should add a Connection under your “In your App” section.
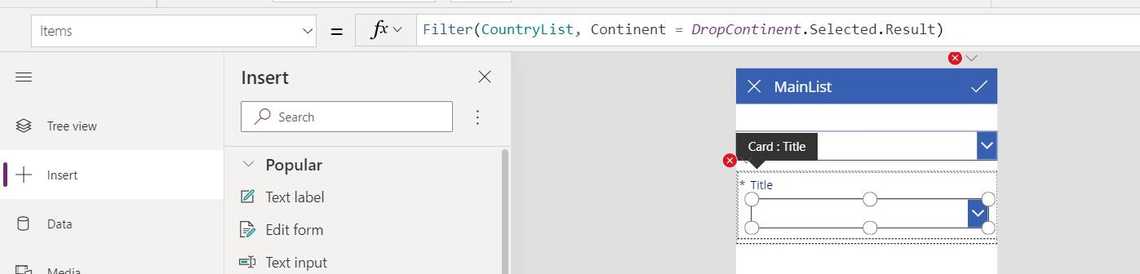
Now let’s add the first dropdown to our canvas. We can do that by clicking on Insert > Dropdown. We are going to call it “DropContinent.”
To bind our first dropdown to the appropriate data source, we can do that by selecting the dropdown and then selecting the property named “Items,” then putting “Distinct(CountryList, Continent).” I use the “Distinct” function so that unique values will show up in our DropContinent
Once it is bound, our first value should already be shown in our form.

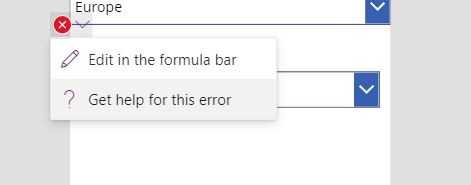
Now let’s do the same thing to our Title Dropdown. But now we will have a different “Items” value to it. We will use the filter function. Select our second dropdown select the “Items” property then type in “Filter(CountryList, Continent = DropContinent.Selected.Result)”
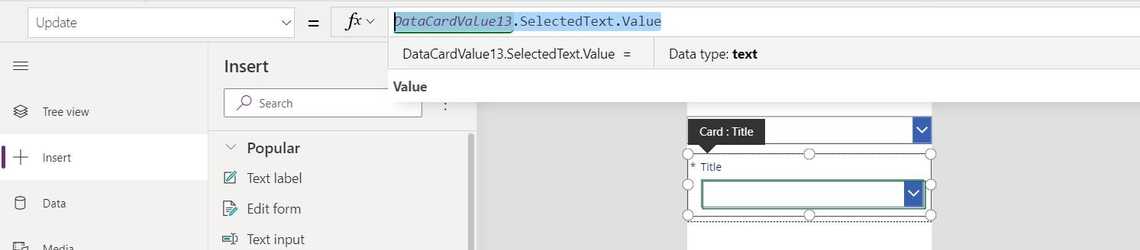
Note that it will error out, so try clicking on “Edit in the Formula bar.”
We should now update the “Update” property with “DataCardValue13.SelectedText.Value”
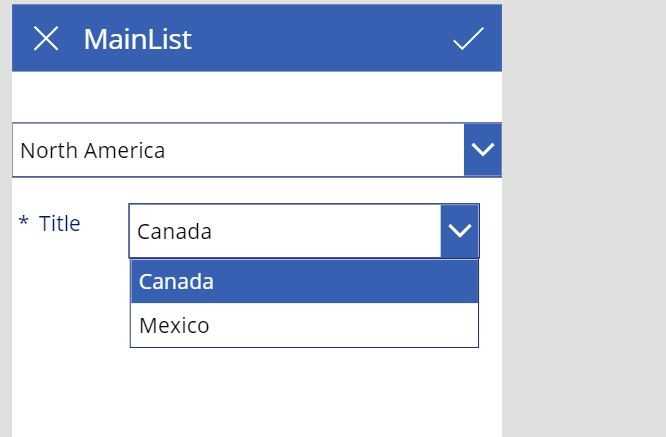
Let try it out in the Preview(Press F5). We select “North America” on our first dropdown, and with that, only choice under “North America” shows up.
Lets us try now to Publish our form and try it out.


